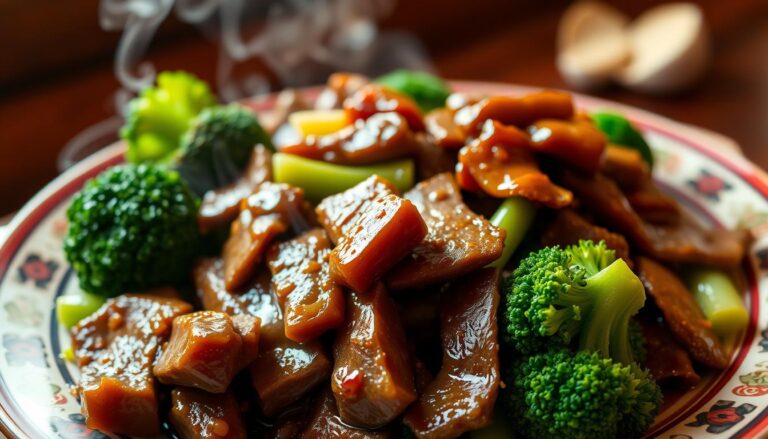
Beef Ribs in Oven: Slow-Cooked Method Explained
There’s something special about pulling beef ribs from the oven. They bend under their own weight, and the smell is amazing. You’ve made restaurant-quality meat at home, easily and without fancy tools.
Learning to cook beef ribs in the oven is simple. It needs patience and a basic idea: slow cooking makes tough meat tender. Your oven turns into a magic tool, making every bite soft and delicious.
Oven baked beef ribs are easy to make. You’ll spend little time on them. Just control the temperature, keep them moist, and cook them long enough. This method is great for a weekend or special meal, as it’s impressive but easy to do.
Table of Contents
Why Slow-Cooking Beef Ribs in Oven Delivers Fork-Tender Results
Cooking slow roasted beef ribs is more than just heating up meat. It’s a science that turns tough tissue into tender, silky meat. The secret to tender beef ribs is patience. Many cooks rush their ribs, but they need time, low heat, and moisture to be perfect.
The Science Behind Low and Slow Cooking
Beef ribs have lots of collagen, a protein that makes them chewy. This protein turns into gelatin when cooked slowly. The best temperature for this is between 250 to 300 degrees Fahrenheit.
At these temperatures, collagen breaks down slowly without drying out the meat. High heat cooks fast but hardens proteins. Low heat cooks slower but softens the meat from the inside. Your recipe works because it gives collagen time to change.
How Moisture and Time Break Down Tough Connective Tissue
Moisture is key for slow roasted beef ribs. Covering the pan creates steam that keeps the meat moist. This steam helps the collagen dissolve.
A little liquid in the pan is all you need. Just enough to make steam. Here’s what happens during cooking:
- Steam surrounds the meat and prevents moisture loss
- Heat slowly breaks down collagen chains into gelatin
- Gelatin absorbs into the meat, creating tenderness
- Connective tissue softens and becomes edible rather than chewy
- Flavors concentrate as liquids reduce
Time, temperature, and moisture work together for success. Your slow roasted beef ribs will be tender after hours of cooking. This is why rushing doesn’t work—collagen conversion needs hours of gentle heat. Following this method shows why patience is key for tender beef ribs.
Choosing the Right Cut: Beef Short Ribs vs Beef Back Ribs
Choosing the right rib cut is key to great oven cooking. You can pick between beef short ribs and beef back ribs. Each has its own taste and texture. Knowing the differences helps you choose the best for your recipe.
Beef back ribs come from the rib area, like prime rib. They have long bones with meat between them. Back ribs are leaner and cook faster, reaching tenderness in about 3 hours.
Beef short ribs come from the chuck or plate sections. They have thick meat with lots of marbling. The meat sits on top of the bone, making them flavorful and tender with extra oven time.
| Feature | Beef Back Ribs | Beef Short Ribs |
|---|---|---|
| Origin on Cow | Rib section | Chuck or plate section |
| Meat Placement | Between bones | On top of bones |
| Fat Content | Leaner | More marbling |
| Cooking Time | Around 3 hours | 3.5 to 4 hours (or more) |
| Flavor Level | Mild to moderate | Rich and robust |
| Typical Portion | 4 pounds per recipe | 4 pounds per recipe |
Start checking your short ribs at 3 hours. They might need 30 minutes to 1 hour more than back ribs. This extra time breaks down the connective tissue.
Here are key things to consider when choosing your cut:
- Check the meat-to-bone ratio at your butcher counter
- Look for good marbling throughout the meat
- Consider how many people you’re feeding (plan 1 to 1.5 pounds per person)
- Decide whether you prefer individual ribs or full racks
- Check for bright red color and firm texture in the meat
Both cuts are great for slow-cooking in your oven. Your choice depends on flavor and time. Short ribs offer richer flavor but take longer. Back ribs are leaner and cook faster. Either way, you’re in for delicious oven-cooked ribs.
Essential Ingredients for Oven Baked Beef Ribs
Learning to cook beef ribs in the oven starts with the right ingredients. These ingredients turn simple ribs into something amazing. Beef ribs are tasty on their own, but the right seasonings make them even better.
There are two main ways to flavor your ribs: a dry rub or a marinade. A dry rub creates a tasty crust quickly. A marinade takes longer but adds deep flavors to the meat.
Building a Flavorful Dry Rub or Marinade
When cooking beef ribs in the oven, you have two seasoning options. The dry rub method uses simple ingredients to make a fragrant crust.
| Dry Rub Ingredients | Marinade Ingredients |
|---|---|
| 1 tablespoon garlic powder | 5 tablespoons jerk seasoning blend |
| 1 tablespoon onion powder | 6 tablespoons grape-seed or olive oil |
| 2 teaspoons smoked paprika | 4 garlic cloves |
| 1 tablespoon fine sea salt | 1 tablespoon shallot |
| 2 teaspoons black pepper | ½ tablespoon kosher salt |
For the dry rub approach, mix all ingredients in a bowl. Rub the mixture onto the ribs, focusing on the meaty side.
The marinade method gives deeper flavors. Mix jerk seasoning, oil, garlic, and shallots until smooth. Apply it before cooking or marinate overnight. Rub the marinade well into the meat for even flavor.
The Role of Salt in Tenderizing Beef
Salt does more than add flavor when cooking beef ribs. It breaks down proteins, making the meat tender. Season your ribs liberally with kosher salt, unless you’re watching your sodium intake.
Salt works by drawing moisture to the meat’s surface. This moisture gets reabsorbed with your seasonings. This self-basting effect keeps your ribs juicy and flavorful.
Don’t trim too much fat from your ribs. Only remove excess fat. The fat renders during cooking, basting the meat and adding flavor and tenderness. This natural basting is key for tender ribs.
Preparing Your Beef Ribs in Oven: Step-by-Step Process
Preparing beef ribs for oven cooking takes patience and detail. The prep phase is key for tender, tasty results. Start by rinsing the ribs in a colander to remove butchering bits. This makes sure your meat is clean and ready for seasoning.
After rinsing, pat your ribs completely dry with paper towels. This step is crucial. Wet meat can’t hold seasonings well. Dry ribs help your seasonings stick, creating a tasty crust.
Then, line your baking dish with heavy-duty aluminum foil. This makes cleanup easy and helps seal in moisture. Place your ribs with the bone side down and the meaty side up.
Applying Your Seasonings and Setting Up for Cooking
Pour your marinade over the ribs and massage the seasonings thoroughly into the meat. Focus on the meaty side for the best flavor. Make sure to get the marinade into every part of your beef ribs in oven recipe.
For tender results, follow this wrapping method:
- Create a foil packet around the ribs first
- Cover your baking dish with 2 to 4 layers of heavy-duty foil
- Overlap and seal all edges tightly
- This traps steam and moisture essential for braising
If you marinated your ribs overnight, take them out 30 minutes before baking. This lets them warm up evenly for better oven cooking.
The Low and Slow Cooking Method: Temperature and Timing
Getting beef ribs in oven right is all about finding the right heat and time. The low and slow method turns tough meat into tender, juicy ribs. The temperature and how you cover the ribs are key to success.
Why 250-300 Degrees F is the Sweet Spot
The perfect temperature for cooking beef ribs in oven is between 250 to 300 degrees Fahrenheit. This heat breaks down collagen and melts fat without drying out the meat. Cooking at lower temperatures takes too long and doesn’t help much. Cooking at higher temperatures can burn the outside before the inside is tender.
Begin by cooking your beef ribs in oven at 250 degrees Fahrenheit for 3.5 to 4 hours. This slow start ensures even cooking and keeps the meat moist. If your ribs need more time, raise the oven to 300 degrees Fahrenheit for the last 1 to 1.5 hours. The size of your beef short rib racks might need an extra 30 minutes to 1 hour of cooking.
Covering Techniques to Trap Moisture and Steam
Keeping steam trapped is crucial when cooking beef ribs in oven. The right covering keeps the meat moist and tender. Use heavy-duty aluminum foil to seal your ribs tightly.
- Wrap individual ribs or the entire rack securely in foil
- Cover your baking dish with additional foil layers
- Overlap and seal all edges tightly
- Create a double-barrier to prevent steam escape
To see if your beef ribs in oven are done, lift a corner of the foil to release steam. Use a fork to test the meatiest rib. If it cuts through easily, your ribs are ready. If not, reseal and cook some more. The fork test is better than the timer since rib sizes vary.
Common Mistakes to Avoid When Cooking Tender Beef Ribs
To get fall off the bone beef ribs, you need patience and focus. Many home cooks make mistakes that make their ribs tough and dry. Knowing these common errors helps you cook better ribs every time.

The biggest mistake is rushing the cooking process. You might think three hours is enough, but bigger cuts need four to five hours. This time is needed for the meat to become tender. Don’t try to cook it faster by raising the oven temperature.
Another big mistake is not using enough liquid in the baking dish. Even a little water, broth, or wine helps create steam for braising. Without it, you’re just roasting, leading to dry meat. Use about a quarter to half a cup of liquid in the pan.
Opening the oven door too often is also a problem. Each time you do, moisture escapes, stopping the braising. Trust the cooking process. Wait until you’re close to the minimum cooking time before checking.
| Common Mistake | What Happens | How to Fix It |
|---|---|---|
| Cooking too fast | Tough, chewy meat | Cook at 250-300°F for 4-5 hours |
| Not using enough liquid | Dry ribs that don’t braise | Add 1/4 to 1/2 cup liquid to pan |
| Uncovering ribs too early | Moisture escapes, braising stops | Keep ribs covered until near completion |
| Trimming too much fat | Loss of flavor and moisture | Leave a thin fat cap on meat |
| Not seasoning enough | Bland final dish | Use generous amounts of salt in rub |
Watch out for these additional mistakes:
- Removing too much surface fat before cooking
- Not letting marinated ribs reach room temperature
- Using insufficient seasoning in your dry rub
- Cooking with the pan uncovered
By avoiding these errors, you can achieve tender beef ribs. The key is to give your meat enough time, moisture, and heat to become tender.
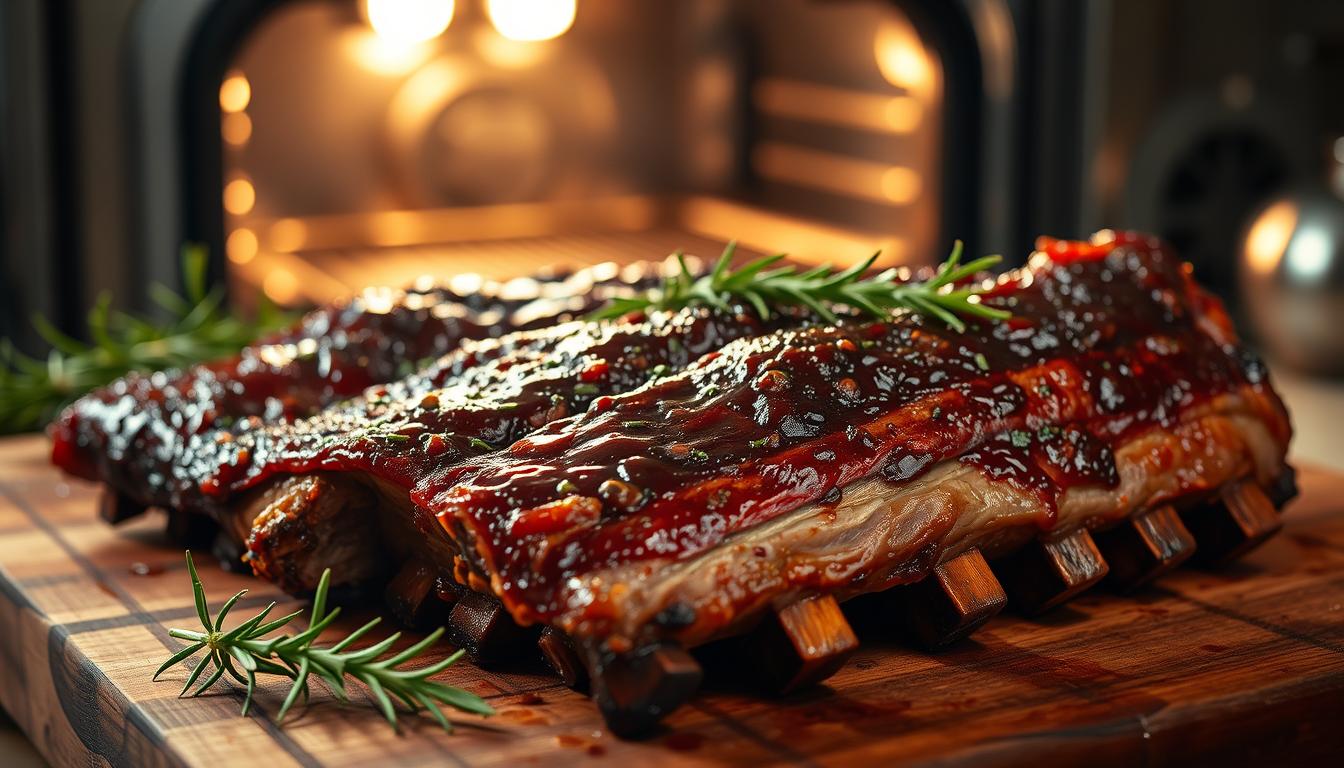
Finishing Touches: BBQ Sauce and Caramelization Under the Broiler
Your bbq beef ribs oven recipe is almost done. After slow cooking for hours, your ribs are tender and ready. This final step adds flavor and a caramelized exterior, making your dish stand out.
After slow cooking, take the ribs out of the oven. Throw away any liquid in the pan. This keeps your ribs from getting soggy. Now, it’s time to add that BBQ flavor.
Applying Your BBQ Sauce
Brush your favorite BBQ sauce on the meaty side of the ribs. You’ll need about ½ cup of barbecue sauce. Make sure to cover every part evenly.
Put the sauced ribs under the broiler for 2 to 4 minutes. Keep an eye on them. The heat will make the sauce sticky and slightly charred. Don’t leave the oven, as burnt ribs can happen fast.
How to Achieve Fall Off the Bone Texture
For fall-off-the-bone ribs, the meat should pull away easily. Your slow-cooked method makes this happen.
- Meat pulls away easily with a fork
- Bones slide out without tearing the meat
- Texture stays moist, never dry
BBQ sauce is optional, but it adds flavor. It brings the outdoor BBQ taste to your kitchen.
Serving Suggestions and Storage Tips for Braised Beef Ribs
Your oven baked beef ribs need the right sides to shine. The meat’s rich flavors pair well with sides that complement or balance it. The right sides can make your meal even better.
Here are some classic sides that go great with your ribs:
- Garlic-herb mashed potatoes soak up juices and sauce nicely
- A crisp green salad with vinaigrette cuts through the meat’s richness
- Sautéed green beans add a healthy, tender-crisp touch
- Southern fried corn brings creaminess and sweetness
- Cornbread, coleslaw, or roasted veggies complete the meal

Leftover ribs are easy to store for later. Cool them down, then put them in airtight containers or freezer bags. This keeps them fresh for a long time.
Reheating ribs right keeps them moist. Let them come to room temperature first. Then, reheat them at 375 degrees, covered, until warm. This method helps them stay juicy.
| Storage Method | Duration | Best Quality |
|---|---|---|
| Refrigerator | Up to 3 days | 2-3 days |
| Freezer | Up to 3 months | 1-2 months |
Longer cooking makes ribs more tender. But, some like them to fall apart, while others prefer them to stay together.
Conclusion
Preparing beef ribs in the oven is easy and yields great results. You just need a few basic ingredients and simple steps. The best part is, you don’t have to do much once you season the ribs and put them in the oven.
The only downside is the time it takes. Your beef ribs will need three to four hours to get tender. This long cooking time is key for tender, flavorful meat. It’s a trade-off of time for effort, perfect for busy days.
To check if your ribs are done, use the fork test. If you can easily cut through the meat with a fork, they’re ready. This method doesn’t require special tools or experience. The results are worth the wait, with meat that’s tender and full of flavor. Your family and guests will be impressed, and you’ll feel confident in your cooking skills.