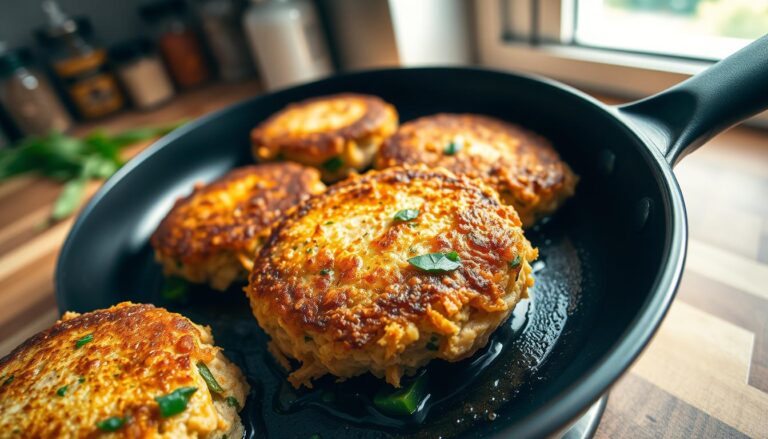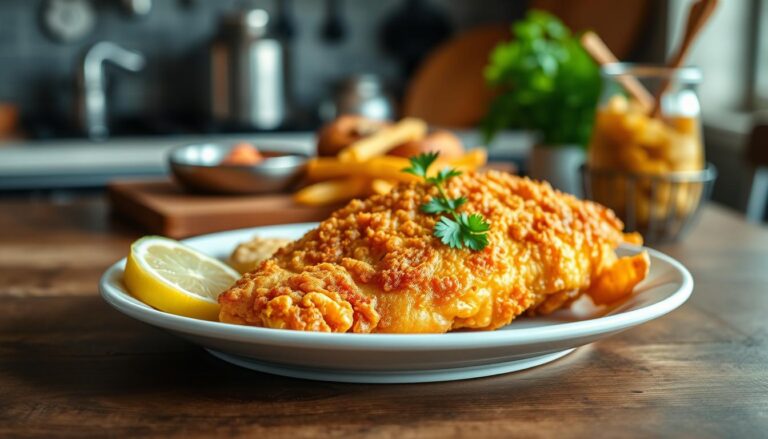
How to Make Crispy Fried Fish with the Perfect Batter
There’s something magical about biting into fried fish. The golden, crunchy exterior shatters, revealing tender fish inside. You might remember enjoying this dish at your favorite restaurant.
Learning to make crispy fried fish at home is easier than you think. It saves money and lets you pick your favorite fish. You can customize your dish with fresh fish from your local market.
This guide will teach you how to make crispy fried fish. You’ll learn easy techniques and professional tips. The beer batter method makes the fish crispy and delicious, perfect for special occasions.
Fried fish also freezes well for up to a month. This means you can make a big batch and enjoy it later. It’s a great way to save time and have more meals.
Table of Contents
Why Beer Battered Fried Fish is a Classic Favorite
Beer battered fried fish is a favorite seafood dish worldwide. It combines a crispy exterior with tender, flaky fish. This makes it a timeless choice for both home cooks and restaurants. Knowing the history and science behind beer batter helps you see why it’s so great for frying fish.
The Origins of Fish and Chips
Fish and chips became popular in the 1800s in England. Portuguese and Spanish fishermen fried their catch in batter to keep it fresh during long voyages. When they arrived in England, locals loved this method.
This combo turned into a street food hit in industrial cities. Vendors sold fried fish wrapped in newspaper to families. This tradition moved to America, where fish fries became community events.
- English fishmongers paired fried fish with fried potatoes
- The dish was affordable protein for working-class families
- Fish and chips shops were neighborhood gathering spots
- After World War II, it spread across North America
What Makes Beer Batter So Special
Beer batter makes a light and crispy coating through cooking chemistry. The carbonation in beer creates air pockets in the batter. These pockets expand in hot oil, giving you that crunchy texture you love.
The beer’s yeast and enzymes break down starches, making the batter less dense. The alcohol in the beer evaporates quickly at frying temperatures. This leaves behind a delicate, golden texture. This is why beer batter beats plain water-based batters.
- Carbonation creates air pockets for maximum crispiness
- Beer’s enzymes prevent a heavy, dense coating
- Alcohol evaporation adds to the light texture
- Lager beer works best for optimal results
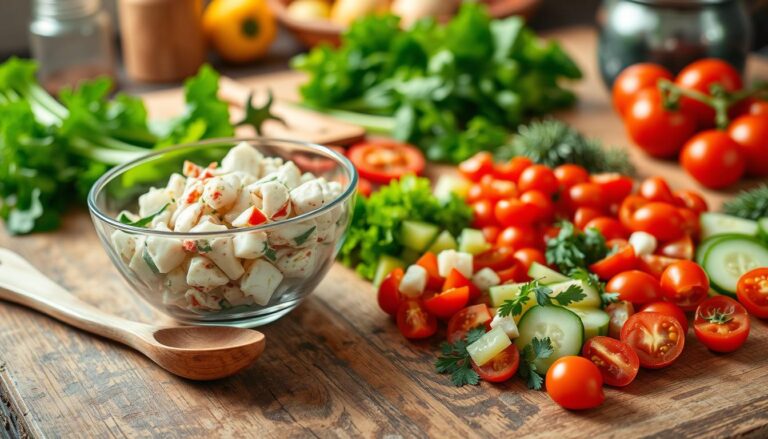
Choosing the Best Fish for Your Fried Fish Recipe
The type of fish you pick is key to a tasty fried fish dish. It affects the taste, texture, and how your meal turns out. Knowing the best fish to choose helps you make better decisions at the seafood counter.
Haddock is a top pick for American fish fries, especially in Buffalo-style dishes. Its mild flavor is a hit. Cod is the go-to for British fish and chips, with a firmer texture and taste that’s great with beer batter.
- Tilapia is easy on the wallet and perfect for those watching their budget
- Catfish adds a Southern twist with its unique flavor
- Halibut is a premium choice for special meals, with a firm texture
- Flounder offers a delicate and sweet taste that’s fancy
- Perch and walleye are favorites in freshwater areas
- Pollock and coley are affordable without losing quality
Don’t forget to ask your local fishmonger for advice. They can suggest the freshest fish and local varieties you might not know about. Fresh fish should feel firm, smell clear, and look bright.
When cutting your fillets, make sure they’re all 4-ounce pieces. This helps them cook evenly. Using high-quality ingredients means your fried fish will always taste great.
Essential Ingredients for the Perfect Crispy Batter
Making crispy fried fish starts with the right ingredients. Each one plays a key role in creating that golden, crunchy coating. The secret is in combining all-purpose flour, cornstarch, baking powder, and the right liquid base.
Your batter should be like thin pancake batter. This ensures even coating and prevents soggy layers. The right consistency means your fish cooks evenly and stays crispy.
The Role of Cornstarch in Creating Crunch
Cornstarch is crucial in your fried fish recipe. First, dust your fish with cornstarch to absorb moisture. Then, add it to your batter for a lighter, crispier coating.
Adding cornstarch to your batter makes it crispier than flour alone. It has no gluten, creating a delicate structure when fried. This results in a coating that stays crunchy, not chewy or dense.
- Dusting technique: Apply cornstarch to fish before battering
- Batter function: Creates ultra-crispy, delicate texture
- Moisture control: Absorbs excess surface water from fish fillets
Why Beer Makes Batter Lighter and Crispier
Beer adds something special to your batter. Its carbonation creates air pockets that expand when fried. This makes your batter light and crispy.
Use light-colored beer like lager or pale ale for best results. The carbonation is key, not the alcohol. Non-alcoholic beer or club soda works well too. The bubbles disappear during frying.
“The carbonation in your liquid base creates the foundation for exceptional crispiness in every batch.”
Selecting the Right Flour and Leavening Agents
All-purpose flour is perfect for your batter base. For gluten-free, a 1:1 blend works well. Both provide structure for crispy results.
Baking powder is key for the perfect texture. It leavens the batter, creating a lighter, crispier coating. The reaction with liquid ingredients prevents density.
Seasonings add flavor. Garlic powder and onion powder add savory depth. Sweet or smoked paprika adds warmth and color. A pinch of salt enhances all flavors.
| Ingredient | Purpose | Amount per Cup |
|---|---|---|
| All-purpose flour (or gluten-free 1:1 blend) | Base structure and coating | 1 cup |
| Cornstarch | Ultra-crispy texture and moisture control | ¼ cup |
| Baking powder | Leavening and air bubbles | 1½ teaspoons |
| Salt | Flavor enhancement | ½ teaspoon |
| Garlic powder | Savory depth | ½ teaspoon |
| Onion powder | Additional savory notes | ½ teaspoon |
| Sweet paprika (smoked preferred) | Flavor and golden color | ¼ teaspoon |
| Beer (lager, pale ale, or non-alcoholic) | Carbonation for crispiness | 1 cup cold |
Cold liquid is important. Whether it’s cold beer, non-alcoholic beer, or club soda, keep it chilled. Cold liquids react better with baking powder and maintain carbonation, giving you crispiness.
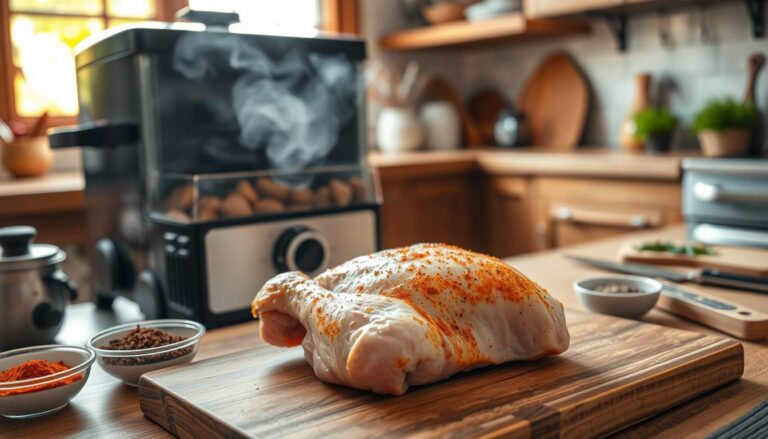
Preparing Your Fish Fillets for Frying
Getting your fish ready for the fryer is where the magic happens. This step shows if you’re a pro or just starting. Don’t rush this part. Proper preparation makes your fish crispy and golden.

Drying the Fish Properly
Moisture is bad for crispy fried fish. Water and hot oil don’t mix well. Start by laying your fish on a clean cutting board.
Use high-quality paper towels to dry them well. Pay extra attention to crevices and thicker parts. These spots hide moisture that can ruin your fish.
Work across each fillet carefully. Press gently but firmly. Dry fish is key for a perfect golden crust.
Seasoning and Dusting Techniques
Now, learn how to season and dust your fish like a pro. Start with salt and black pepper. Use about one-quarter teaspoon of salt and one-eighth teaspoon of pepper per fillet.
Then, dust your fish with cornstarch (or flour). Use about 3 tablespoons for four fillets. Rub the cornstarch evenly over the fish, then shake off excess. You want a light dusting.
This cornstarch coating is crucial. It absorbs moisture and helps the batter stick. These steps are key to making your fish taste amazing.
- Pat fish completely dry with paper towels
- Season with salt and black pepper evenly
- Dust lightly with cornstarch
- Shake off excess coating gently
- Work quickly before battering
“The difference between mediocre fried fish and restaurant-quality fried fish lies entirely in the preparation. Dry your fish, season it properly, and dust it with cornstarch. These simple steps create magic in the fryer.”
How to Make the Ultimate Beer Batter from Scratch
Creating the perfect beer batter starts with understanding how each ingredient works together. Your success begins in the preparation stage, where you combine all your dry ingredients in a large bowl. This is where the foundation of your crispy coating comes together.
Start by gathering your dry ingredients. You’ll need flour as your base, along with cornstarch (2 tablespoons), salt (3/4 teaspoon), garlic powder, onion powder, smoked paprika, and baking powder. Add these to a large bowl and whisk to combine thoroughly. This mixing step prevents clumps of seasoning from forming and ensures every bite of your fried fish tastes perfectly seasoned.
Once your dry ingredients are ready, pour in beer (1 1/4 cups) and whisk together. Don’t worry if your batter looks lumpy at first—that’s exactly what you want. The batter should look like thin pancake batter, light and pourable. Over-mixing develops gluten, which creates a tougher, less crispy coating on your fish.
The consistency matters greatly. Beer batter should be on the thin side so it coats the fish in an even layer and forms a crust to steam the fish inside. If your mixture seems too thick, add more beer one tablespoon at a time until you reach the right texture.
The Resting Period That Changes Everything
Let the batter rest for about 15 minutes (the time it takes to heat the oil) or up to 45 minutes. This resting period helps achieve the crispiest coating possible. During this time, the flour fully hydrates, the gluten relaxes, and the baking powder begins working its magic.
| Ingredient | Amount | Purpose |
|---|---|---|
| Flour | Base amount | Creates structure and coating |
| Cornstarch | 2 tablespoons | Adds extra crispiness |
| Salt | 3/4 teaspoon | Enhances flavor |
| Baking Powder | Standard amount | Creates light, airy texture |
| Beer | 1 1/4 cups | Adds moisture and carbonation |
| Garlic Powder | To taste | Adds savory flavor |
| Onion Powder | To taste | Adds depth to seasoning |
| Smoked Paprika | To taste | Adds color and smoky flavor |
If you prefer a water-based version, use 125g self-raising flour, 3 tablespoons cornflour, 2 teaspoons baking powder, 1 teaspoon salt, and 175-200ml cold water. The colder the water, the better your results. Cold liquids create temperature contrast when they hit hot oil, producing extra crispiness.
Use very cold beer whenever possible. The temperature difference between your cold batter and hot frying oil creates steam, which separates the coating from the fish and produces those desirable crispy layers you’re after.
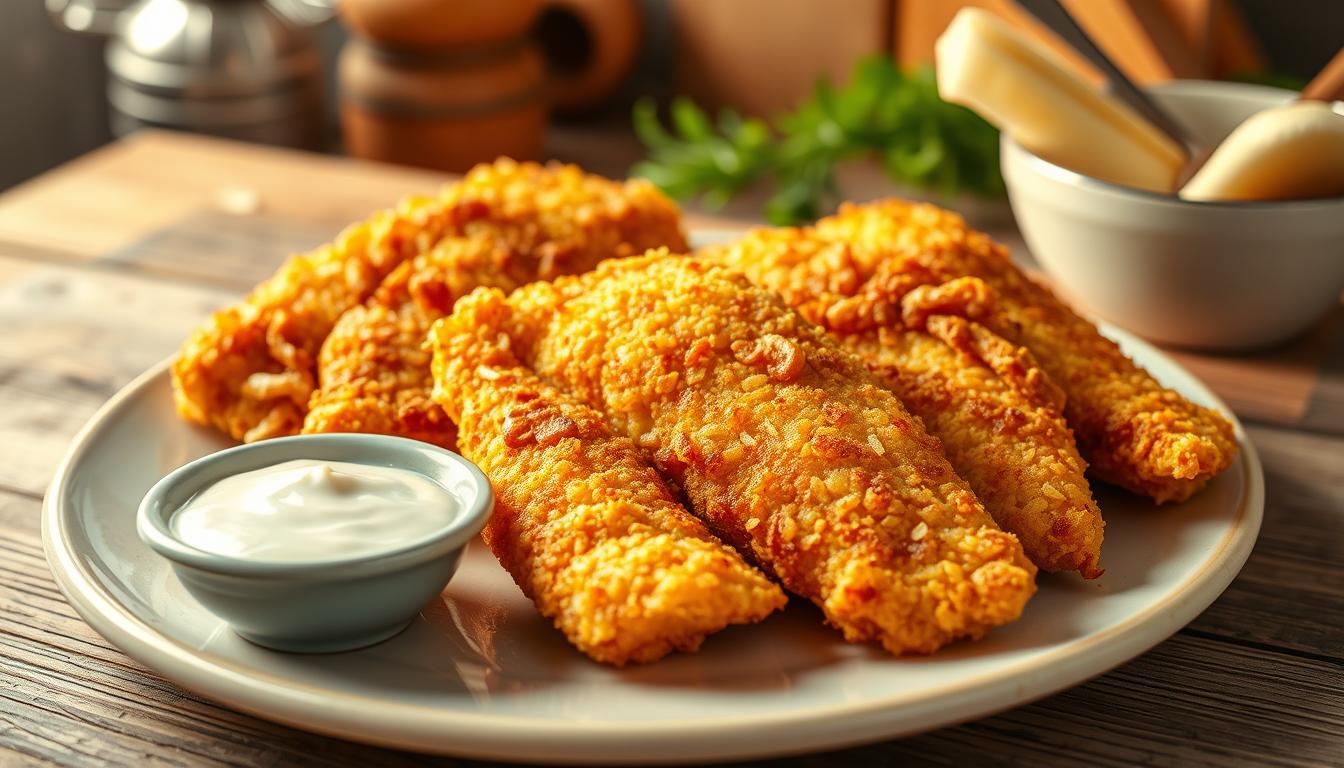
The Secret to Perfectly Crispy Fried Fish Every Time
To get crispy fried fish, you need to pay close attention to a few key steps. Understanding how to control the oil temperature and the right way to coat the fish are crucial. With these tips, you can make perfectly golden fish every time.
Getting Your Oil Temperature Just Right
The temperature of your oil is very important for fried fish. If it’s too cool, the batter soaks up too much oil and gets soggy. If it’s too hot, the outside burns before the inside is cooked.
The best temperature for frying is 365°F. Some people prefer 170°C (340°F) instead. Always use an instant-read thermometer to check the oil’s temperature. This way, you can adjust the heat as needed.
When you add cold fish to hot oil, the temperature drops. You’ll need to adjust the heat to keep it at the right level. This ensures your fish gets a crispy coating.
Coating Techniques for Even Coverage
How you coat the fish affects its crispiness. Start by choosing the right fish. Look for firm-fleshed, mild-flavored white fish. Make sure the fish is dry before you coat it.
Make your batter thin, like pancake batter. Let it rest for 15 minutes before coating. This helps the batter coat evenly.
To fry, dip the fish in batter and let excess drip off. This way, you get a nice coating without too much batter.
- Carefully slide the fish into the hot oil rather than dropping it to prevent splashing and help the batter set properly
- Lower fish into oil slowly to allow it to form a seal and prevent sticking to the basket
- Cook just two or three pieces at a time—do not overcrowd the pot
- Ensure the oil temperature stays consistent between batches
Don’t overcrowd your pot. This can lower the oil temperature too much. Cooking a few pieces at a time keeps the temperature steady. This ensures a crispy coating and prevents greasy fish.
| Temperature Method | Fahrenheit | Celsius | Best Results |
|---|---|---|---|
| Primary Standard | 365°F | 185°C | Golden, crispy exterior; fully cooked fish |
| Alternative Method | 340°F | 170°C | Slower cooking; excellent crust development |
| Too Cool | Below 340°F | Below 170°C | Soggy, greasy coating; excessive oil absorption |
| Too Hot | Above 375°F | Above 190°C | Burnt exterior; undercooked interior |
By following these professional tips, you can make every piece of fried fish perfectly crispy and golden.
Deep Frying vs Pan Fried Fish: Which Method is Best
When cooking crispy fried fish at home, you have a big choice. Should you deep fry or pan fry? Each method gives different results. Knowing the differences helps you choose the best way to cook your meal.
Both deep frying and pan frying make delicious fish. Your choice depends on several things. These include how much oil you want to use, your kitchen setup, and the texture you like.
| Cooking Method | Oil Amount | Temperature | Cooking Time | Texture Result | Best For |
|---|---|---|---|---|---|
| Deep Frying | 3-4 quarts | 350-375°F | 3-5 minutes | Extra crispy exterior | Large batches, fish and chips |
| Pan Frying | 1-2 cups | 350-375°F | 3-4 minutes per side | Golden, crispy coating | Small portions, home cooking |
Deep frying fully submerges your fish in hot oil. This method makes the fish’s exterior very crispy in just minutes. The fish cooks evenly on all sides. You get that golden crust that people love.
Pan frying uses less oil. You only need enough to cover the bottom of your skillet. This method is great for cooking for a few people. It uses less oil and makes less mess in your kitchen.
Deep frying needs more equipment and preparation. You need a large pot or commercial fryer. You should use a thermometer to keep your oil at the right temperature. Pan frying is easier for most home kitchens. A regular skillet and some oil are all you need.
- Deep frying requires careful oil disposal
- Pan frying uses less oil overall
- Deep frying creates crispier results faster
- Pan frying works well for home cooking
Both methods make tasty fried fish when you use the right batter and keep the oil temperature right. Your choice depends on your cooking style and kitchen space. Pan frying is simpler for home cooks. Deep frying is better for large gatherings, giving consistent, impressive results.
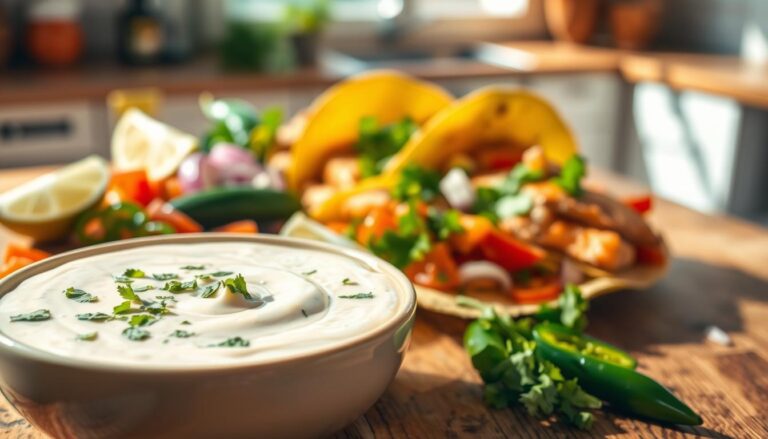
Making Homemade Tartar Sauce to Complement Your Fish
Your crispy fried fish needs a sauce that’s just as good. Store-bought tartar sauce often tastes bland and has weird ingredients. Making your own tartar sauce at home is quick and makes your fish dish taste like it’s from a restaurant. You get to control every flavor, making a sauce that’s just right for you.
When you make tartar sauce yourself, you know what’s in it. You avoid bad stuff and use real, fresh ingredients. Your family will love the taste of this sauce with your fried fish.

Fresh Ingredients That Make a Difference
Great tartar sauce starts with a creamy base. Use 3/4 cup mayo for this. Then, add 4 tablespoons minced dill pickle for that classic pickle flavor.
Next, add 1 tablespoon dill pickle juice for more pickle taste. Mix in 1/2 tablespoon fresh lemon juice and 1/2 teaspoon lemon zest for a bright taste. Use 1 clove garlic crushed for a fresh depth. You can also add 1 tablespoon chopped fresh dill for an extra herby touch.
Optional ingredients include 2 teaspoons capers for extra flavor. These small additions make your sauce amazing.
Balancing Tangy and Creamy Flavors
The secret to great tartar sauce is balancing flavors. Add 3/4 teaspoon Worcestershire sauce for richness. Use 3/4 teaspoon Dijon mustard for a sharp bite. For a bit of heat, add 3/4 teaspoon hot sauce.
Finish with 3/4 teaspoon sugar to balance everything. Season with 1/4 teaspoon salt and 1/4 teaspoon black pepper. Mix all ingredients, taste, and adjust as needed.
Cover and chill until you’re ready to serve. This sauce keeps well in the fridge for up to 1 week. Your fried fish will be even better with this homemade sauce.
| Ingredient | Amount | Purpose |
|---|---|---|
| Mayo | 3/4 cup | Rich, creamy base |
| Minced dill pickle | 4 tablespoons | Classic pickle flavor |
| Dill pickle juice | 1 tablespoon | Adds tanginess |
| Fresh lemon juice | 1/2 tablespoon | Bright citrus notes |
| Fresh lemon zest | 1/2 teaspoon | Tangy, citrusy notes |
| Chopped fresh dill | 1 tablespoon | Classic ingredient for signature flavor |
| Capers (drained) | 2 teaspoons | Salty, tangy bursts (optional) |
| Crushed garlic | 1 clove | Fresh depth |
| Worcestershire sauce | 3/4 teaspoon | Umami punch |
| Dijon mustard | 3/4 teaspoon | Sharp note cutting through mayo’s richness |
| Hot sauce | 3/4 teaspoon | Adds depth without spiciness (optional) |
| Sugar | 3/4 teaspoon | Balanced flavor |
| Salt | 1/4 teaspoon | Seasoning |
| Black pepper | 1/4 teaspoon | Seasoning |
Making your own tartar sauce takes just minutes but gives you restaurant-quality results that store-bought versions cannot match.
Serving Your Crispy Fried Fish Like a Pro
When your beer battered fish is done, your work is just starting. How you serve it can make all the difference. Move your fish to a baking tray with a wire rack right away. This keeps the bottom from getting soggy.
Never put fried fish on paper towels or a plate. Steam trapped there can make the coating soft quickly.
If you’re frying in batches, keep the first batch warm in a 200°F oven. This keeps everything hot and ready to eat.
Classic American Fish Fry Presentation
Beer battered fish goes great with coleslaw for a cool, tangy crunch. Add fries or potato salad as your starch. Tartar sauce and lemon wedges are perfect for dipping.
- Coleslaw for cooling contrast
- Crispy fries or creamy potato salad
- Tartar sauce for dipping
- Fresh lemon wedges
- Salt sprinkled on the fish while hot
British Chip Shop Style Service
In Britain, serve fish with hot chips, thick-cut potatoes. Use starchy potatoes like Russet. Cut them at 1/2-inch wide and soak in cold water for 30 minutes to 2 hours.
Double-fry the chips at 325°F for 5 minutes, then cool. Fry again at 375°F for 5 minutes until golden.
Serve with mushy peas, salt and vinegar, and British condiments. Pickled cucumber and eggs add flavor. Chippy gravy or curry sauce are great toppings too.
| Serving Style | Main Sides | Condiments | Special Touches |
|---|---|---|---|
| American Traditional | Coleslaw, Fries, Potato Salad | Tartar Sauce | Lemon Wedges, Salt |
| British Chip Shop | Chips, Mushy Peas | Malt Vinegar, Chippy Gravy | Pickled Egg, Wally, Curry Sauce |
| Southern Style | Hush Puppies, Coleslaw | Hot Sauce, Tartar Sauce | Lemon Wedges, Salt and Pepper |
Season your fish with salt right after frying. Timing is key for serving fish and chips. Serve everything hot and together for the best experience.
Storing and Reheating Fried Fish to Maintain Crispiness
Your fried fish can stay crunchy even after the first meal. The right storage and reheating methods help. This way, leftovers taste almost as fresh as the first time. Smart storage keeps your meals crisp and saves time on busy nights.
Proper Storage Methods for Leftovers
Let your fried fish cool to room temperature on a wire rack. This prevents moisture from making it soggy. Once cool, store it layered between parchment paper in an airtight container. Parchment prevents sticking and absorbs extra moisture.
Keep your fried fish in the fridge for up to 3 days. Freeze it for up to 1 month for longer storage. This is great for families who want quick, healthy meals.
Reheating in the Air Fryer, Oven, or Stovetop
You have three excellent options for reheating your fish. Choose based on what you have available.
- Air Fryer Method: Preheat to 320°F, add fish directly to basket, and air fry 6-8 minutes flipping once halfway through. This method restores the crispy coating beautifully.
- Oven Method: Preheat to 350°F, put fish on baking tray lined with wire rack or foil, and bake about 15 minutes. This is perfect for reheating large batches.
- Stovetop Method: Preheat skillet over medium to medium-low heat with no oil. Cook until crispy outside and hot in center, about 2-3 minutes per side flipping once. If fish is thicker than 1 inch, cover skillet but leave lid ajar.
Avoid microwave reheating unless it’s your only choice. Microwave steam can ruin the crispiness. These three methods give you restaurant-quality results at home.
Conclusion
Making crispy fried fish at home is easier than you might think. The key steps include choosing the right fish, preparing it well, and making the perfect beer batter. You also need to rest the batter, keep the oil temperature right, and fry it correctly. These steps might seem long, but they’re simple once you try them.
Mastering this skill gives you power. You’ll save money and have control over what you eat. You can choose the freshness, seasonings, and oil quality. Plus, you can use this technique on other foods like veggies, chicken, or cheese.
Start with this recipe to learn the basics. Then, try different fish and seasonings to make it your own. Fried fish is great for meal prep because it freezes and reheats well. Make a double batch for easy meals later.
Embrace the process and trust what you’ve learned. You’ll enjoy serving crispy fried fish you made yourself. Your family and friends will love it.
When you try your first batch, you’ll see why it’s a favorite for so long. You’ve unlocked a skill that brings joy to your kitchen and table.