Chicken Stock Recipe: Easy Homemade Method
Opening your freezer and finding homemade chicken stock is incredibly satisfying. It’s comforting to know exactly what’s in it. No hidden ingredients or unknown sodium. Just pure flavor that makes meals special.
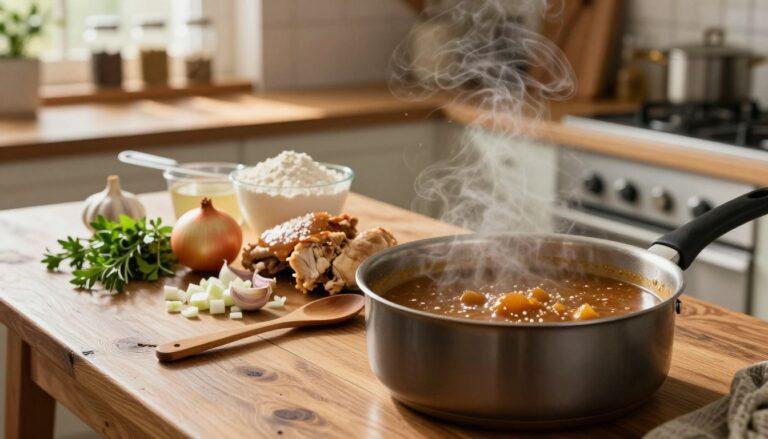
Starting a chicken stock recipe at home might seem daunting. You might think it takes hours or special skills. But, it’s actually simple. You just need basic ingredients and a bit of time. Simmer chicken bones with veggies and herbs, then let it cook.
Your homemade chicken stock will be far better than store-bought. It adds depth to soups, sauces, and more. You control the ingredients and sodium, making it healthier.
This guide shows you how to make top-notch chicken stock at home. Choose from stovetop, slow cooker, or Instant Pot methods. Find the one that works for you and see how easy it is.
Table of Contents
Key Takeaways
- Homemade chicken stock takes just a few basic ingredients and your choice of cooking method
- You can make chicken stock on the stovetop in 6 to 15 hours
- A slow cooker creates excellent stock in 10 to 15 hours with minimal effort
- The Instant Pot method produces quality stock in just 2 hours
- Homemade stock contains no preservatives and gives you control over sodium levels
- Bone-based chicken stock provides collagen and gelatin for nutritional benefits
- Freezing your stock means you always have quality liquid ready for cooking
Why Homemade Chicken Stock is a Kitchen Essential
Making homemade chicken stock is a smart move for your kitchen. It’s a base for many meals, making them richer and more complex. This golden liquid is your secret for soups, sauces, and more.
Homemade stock is far better than store-bought. It has pure flavor without additives or too much salt. You choose what goes into it, getting real depth from bones and herbs. Store-bought can’t compare.
It’s easy to make homemade chicken stock. Use bones from rotisserie chickens or Sunday roasts. This turns kitchen scraps into something valuable. A big batch frozen means you always have quality stock on hand.
Your homemade stock is also good for you. It has collagen, gelatin, and amino acids for joint and gut health. These nutrients come from simmering bones and veggies for hours. Store-bought stock rarely has these benefits.
- Costs less because you use leftovers
- Tastes better than boxed versions
- Lasts up to three months in the freezer
- Provides health-boosting nutrients
- Gives recipes incredible richness
Making stock also fills your kitchen with amazing smells. Seeing the liquid turn golden is satisfying. It’s the magic of homemade chicken stock.
Understanding the Difference Between Stock and Broth
Many people think “stock” and “broth” are the same, but they’re not. Stock and broth are used in cooking but in different ways. Knowing the difference helps you make the right liquid for your dishes and get the health benefits you want.
Stock is made by simmering animal bones with veggies and spices for a long time. Broth, however, is mainly made with meat and cooks for a shorter time. Bone broth is a special type of stock that cooks for 12 to 24 hours to get the most nutrients from the bones.
What Makes Stock Unique
Stock is special because it’s made from bones, not meat. When bones simmer, they release collagen that turns into gelatin. This gelatin makes stock thick and jiggly when chilled.
The long cooking time of 12 to 24 hours for chicken bone broth extracts lots of flavor and nutrients. Stock tastes more neutral and less salty than broth. This makes it great for cooking because you can season it as needed.
Here are the key characteristics that make stock unique:
- Made primarily from bones, not meat
- Long cooking time extracts gelatin and collagen
- Neutral flavor profile allows flexible seasoning
- Creates a rich, silky mouthfeel in soups and sauces
- Thicker consistency when cooled
Nutritional Benefits of Bone-Based Stock
Chicken bone broth is popular for its health benefits. The slow simmering process pulls out minerals like calcium, magnesium, and phosphorus from the bones. These minerals are good for bones, muscles, and overall health.
The collagen and gelatin in bone broth are good for skin elasticity, joint health, and gut lining integrity. The long cooking process releases amino acids like glycine and proline. These help with body functions and may reduce inflammation.
When making chicken bone broth at home, adding a bit of acid like apple cider vinegar helps get more minerals. Acid breaks down the bones, making nutrients easier to get into the stock.
| Nutrient | Benefit | Source |
|---|---|---|
| Collagen | Supports skin elasticity and joint health | Bone connective tissue |
| Gelatin | Aids gut health and digestion | Bone breakdown during simmering |
| Calcium | Strengthens bones and teeth | Mineral extraction from bones |
| Glycine | Supports sleep and muscle recovery | Amino acid from bone tissue |
| Magnesium | Promotes muscle relaxation and energy | Mineral found in bone structure |
Chicken soup has been a tradition for a long time, and it’s backed by science. The nutrients in chicken bone broth can help boost your immune system when you’re sick. It’s a great addition to your cooking routine.
Essential Ingredients for the Perfect Chicken Stock Recipe
Making chicken stock from scratch is easy. You probably have most of the ingredients in your kitchen. Knowing what each ingredient does makes it simple.
The base of your stock is chicken bones. Use bones from chicken backs, necks, wings, feet, or a roasted chicken carcass. Bones with cartilage and connective tissue make the stock richer and more gelatinous. Wings and feet are especially good for deep flavor and silky texture.
- Onions (add savory depth and sweetness)
- Celery (brings earthy, slightly bitter notes)
- Carrots (add subtle sweetness and color)
Use these vegetables in a 2:1:1 ratio. Add garlic (crushed), bay leaves, fresh thyme, and peppercorns for more flavor. A bit of apple cider vinegar or lemon juice helps break down bones and release minerals without making it sour.
Don’t forget the parsley stems. They’re packed with flavor. Good water quality is also important. Use filtered or high-quality tap water since it makes up most of your stock.
| Ingredient | Purpose | Amount |
|---|---|---|
| Chicken bones | Creates gelatin and deep flavor | 3-4 pounds |
| Onions | Adds savory depth | 2 medium |
| Celery | Contributes earthy balance | 1 stalk |
| Carrots | Adds sweetness and color | 1 medium |
| Garlic | Enhances aromatic compounds | 3-4 cloves |
| Bay leaves | Adds herbal notes | 2-3 leaves |
| Apple cider vinegar | Releases minerals from bones | 1 tablespoon |
| Salt | Enhances all flavors | To taste |
Optional additions like fresh dill or kombu seaweed can add umami depth. Your list of chicken stock ingredients is short. Making homemade stock is a simple project for anyone.
Choosing the Right Chicken Bones for Your Stock
Creating a great chicken stock recipe begins with picking the right bones. The bones you pick affect your stock’s taste, texture, and health benefits. Knowing which bones to use and how to prepare them ensures a delicious broth every time.
Best Bone Types for Rich Flavor
Not all bones are created equal for your chicken stock. Bones full of cartilage and connective tissue make the most flavorful stock. They have lots of collagen that dissolves in simmering, giving a smooth feel and rich taste.
The top bones for your chicken stock are:
- Chicken wings—inexpensive and full of cartilage
- Chicken backs and necks—great for gelatin
- Chicken feet—known for their collagen
- Whole chicken carcasses—the meatless frame
- Rotisserie chicken bones—easy and tasty

For a lighter broth, use 4 pounds of bones. For a richer broth, go up to 8 pounds. Mixing different bones adds depth—try a mix of carcass, wings, and neck for varied tastes and textures.
Raw Versus Cooked Bones
You can use raw or cooked bones for your stock, each with its own benefits. Bones from rotisserie chickens or Sunday roasts are great. They’ve already started to flavor up, so you’re just pulling out more.
Raw bones can be roasted at 400°F for 20 to 30 minutes. This Maillard reaction makes your stock even more flavorful. Don’t forget to deglaze your pan with hot water and add the browned bits to your stock pot.
You can mix raw and cooked bones for your stock. Saving bones in a freezer bag until you have enough is a smart move. It cuts down on waste and builds up flavor.
Aromatic Vegetables and Herbs That Elevate Your Stock
Creating flavorful chicken stock is more than just using bones. Adding vegetables and herbs turns simple bones into something special. These ingredients create layers of flavor that make your stock stand out.
The base of most chicken stocks is a French mix called mirepoix. It includes onions, celery, and carrots in a certain ratio. You don’t need exact amounts at home, but knowing what each adds is key.
- Onions add a savory, slightly sweet taste and boost umami
- Celery brings herbal and earthy notes to balance the sweetness
- Carrots add sweetness and a warm color to your stock
Peel the onions to keep your stock clear. You can choose to peel or scrub your carrots. Leave celery leaves on for extra flavor.
Herbs and spices make a sachet d’épices for easy removal. Bay leaves, fresh thyme, parsley stems, and peppercorns are great choices. Use whole spices to avoid clouding your broth.
| Aromatic Ingredient | Flavor Profile | Amount for Flavorful Chicken Stock | Prep Method |
|---|---|---|---|
| Onion | Savory, slightly sweet, umami-rich | 2 medium onions | Peeled, quartered |
| Celery | Herbal, earthy, slightly bitter | 2-3 stalks with leaves | Cut into chunks |
| Carrot | Naturally sweet, warm, golden | 2 medium carrots | Scrubbed or peeled, chunked |
| Bay Leaf | Subtle herbal, tea-like | 2-3 leaves | Whole, dried |
| Fresh Thyme | Earthy, minty undertones | 4-5 sprigs | Tied in bundle or loose |
| Parsley Stems | Fresh, green notes | Handful of stems | Bundled or loose |
| Peppercorns | Gentle heat, complexity | 1 teaspoon whole | Whole, uncracked |
You can also add optional aromatics to customize your stock. Fresh ginger is great for Asian flavors, while fennel adds anise notes. Leeks offer a mild onion taste, and mushrooms add earthy umami. Herbs like rosemary, sage, or tarragon help you create unique flavors.
The secret to great chicken stock is knowing how aromatics work together. They release oils and compounds that add complexity. Your stock will be rich and flavorful, thanks to the bones and the added flavors from vegetables and herbs.
Three Methods to Make Homemade Chicken Stock
Learning to make chicken stock opens up new cooking possibilities. You can choose from three main methods, each with its own benefits and cooking times. The right method depends on your schedule, equipment, and how much time you have.
Stovetop Chicken Stock Method
The stovetop method gives you full control over your stock. You’ll need a large stockpot, at least 8 quarts for a full batch. This method takes the longest, from 6 to 15 hours, depending on the richness you desire.
Start with cold water, about 16 cups for a large pot. Bring it to a boil, then lower the heat to a gentle simmer. Skim away the foam and impurities that rise to the top in the first 10 to 15 minutes. This step is key for clear, clean-tasting stock.
Add your vegetables and herbs after the bones have simmered for several hours. This prevents them from becoming bitter or breaking down too much. Keep the pot at a gentle simmer and add water as it evaporates.
Slow Cooker Chicken Stock Method
The slow cooker method is the most hands-off. It’s perfect for starting your stock before bed or before work. Just combine your ingredients and let it cook unattended.
Use a 6-quart slow cooker with about 12 cups of warm or hot water. Starting with warm water helps extract flavors faster. Set it to low heat and cook for 10 to 15 hours. Add your vegetables and aromatics halfway through to preserve their flavor.
The slow cooker’s enclosed environment means you won’t need to add water. The longer cooking time at lower temperature extracts maximum collagen and nutrients. This method produces excellent stock with minimal effort.
Instant Pot Pressure Cooker Method
The Instant Pot method is the fastest way to make chicken stock. It’s great when you need stock quickly or don’t want to simmer for hours.
A 6-quart or 8-quart Instant Pot can make rich, flavorful stock in just 2 hours. Add all your ingredients at once. Use the soup or broth function, or set it to manual high pressure for 2 hours. Let it cool for 30 minutes before venting any remaining pressure.
Pressure cooking extracts flavor and gelatin fast, making stock as rich as stovetop versions that cooked three times longer. The sealed environment prevents cloudiness, so your stock is clear and appetizing.
| Cooking Method | Cooking Time | Water Amount | Pot Size | Best For |
|---|---|---|---|---|
| Stovetop Chicken Stock | 6-15 hours | 16 cups | 8-quart pot | Maximum control and large batches |
| Slow Cooker Chicken Stock | 10-15 hours on low | 12 cups warm water | 6-quart cooker | Convenience and hands-off cooking |
| Instant Pot Pressure Cooker | 2 hours high pressure | 10-12 cups | 6-8 quart pot | Speed and clear, rich broth |
Each method for making chicken stock produces great results. Choose based on your lifestyle and equipment. All three methods extract the same nutritious, flavorful ingredients from bones and vegetables.
Step-by-Step Instructions for Making Flavorful Chicken Stock
Making easy chicken stock at home is easier than you think. Follow these steps to create rich, delicious stock for your favorite recipes. You can use the stovetop, slow cooker, or instant pot method. These instructions will help you succeed.
Preparing Your Bones for Maximum Flavor
Start by preparing the bones. If they’re raw, put them on a lined baking sheet and roast at 400°F for 20 to 30 minutes. This makes them golden brown and adds flavor.
After roasting, deglaze the pan with hot water. This captures all the flavorful browned bits.
Cut the bones into 3 to 4 inch pieces. This increases their surface area. It helps extract more flavor from the bones.
The Initial Cooking Phase
Put your prepared bones into your chosen pot. Cover them completely with cold water. Using cold water helps impurities rise to the surface.
The water-to-bones ratio is important. Too much water dilutes the flavor. Too little won’t extract enough from the bones.
As the water heats, foam and scum will rise. Skim this off after about 10 minutes. This step makes your stock clear and clean-tasting.
Finding the Perfect Simmer
Look for small bubbles gently breaking the surface. Your liquid should barely move. Aim for a temperature below 185°F.
Vigorous boiling can make your stock cloudy and greasy. Aim for a gentle simmer.
- Keep bones submerged to prevent oxidation and discoloration
- Simmer for 12 to 24 hours for beef or chicken bones
- Add aromatic vegetables after 2 to 3 hours of simmering
- Taste your stock as it cooks to notice flavor development
Knowing When Your Stock Is Done
Your stock is ready when the bones break easily. This means collagen has been extracted. The stock should taste deep and rich.
If your stock is cloudy, it’s still good. It might not be as clear, but it tastes delicious.
| Cooking Method | Temperature Range | Cooking Time | Best Results |
|---|---|---|---|
| Stovetop | 185°F or below | 12 to 24 hours | Maximum flavor extraction |
| Slow Cooker | Low setting | 8 to 12 hours | Convenient and consistent |
| Instant Pot | High pressure | 1 to 2 hours | Quick results with good flavor |
Your easy chicken stock is now ready for straining and storage. This homemade version will elevate your cooking. It will add superior taste to soups, sauces, and grains.
How to Strain and Store Your Homemade Stock
After simmering your homemade chicken stock for hours, the next steps are key. Proper straining removes unwanted particles and solids. Smart storage keeps your stock fresh and ready to use. These final touches make the difference between good stock and excellent stock.
Proper Straining Techniques
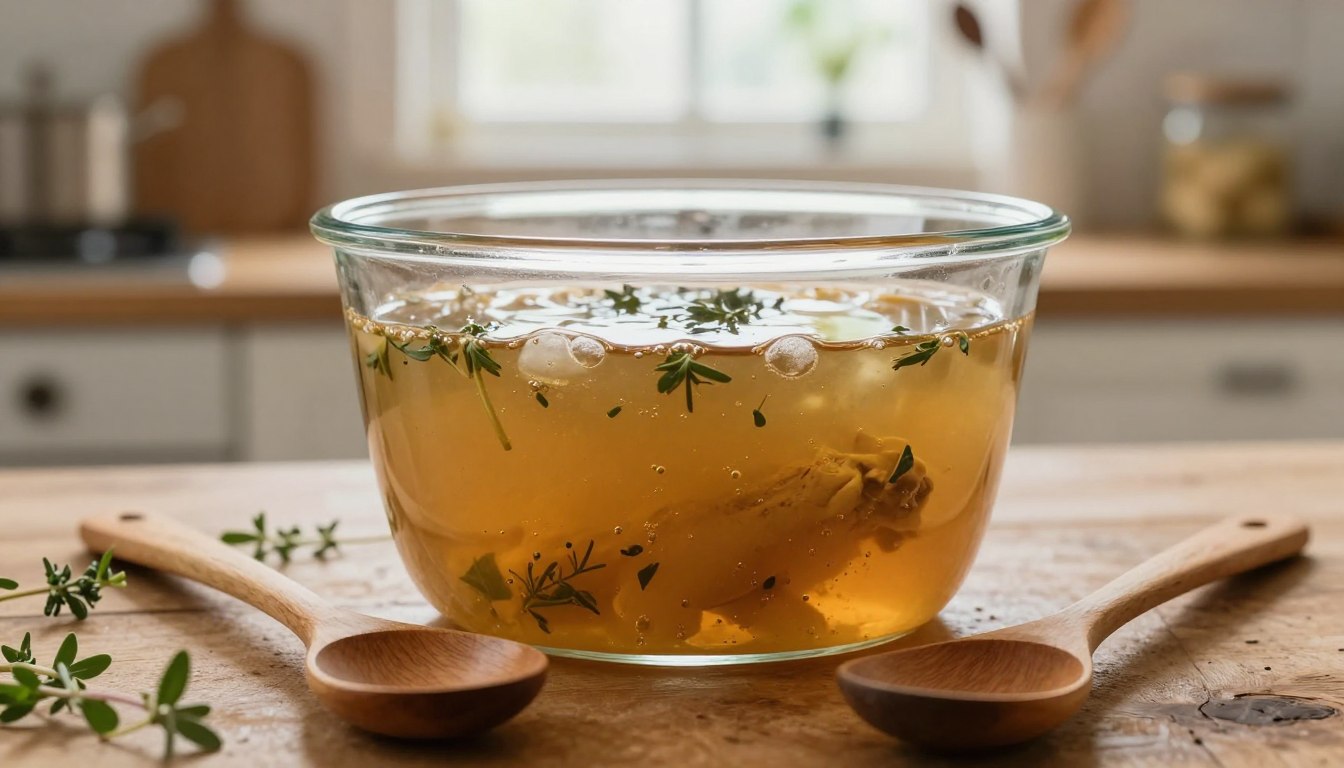
Straining your homemade chicken stock should be done carefully to achieve the clearest results. Pour your stock through a fine-mesh strainer set over a large bowl or pot. Let gravity do the work naturally—avoid pressing down on the solids, as this can push cloudy particles through and make your stock murky.
For extra clarity, line your strainer with cheesecloth or a clean coffee filter. This catches tiny particles that regular mesh might miss. Once you’ve finished straining, discard all bones, vegetables, and herbs. They’ve released all their flavor into your homemade chicken stock.
Let your strained stock rest for about 10 minutes. During this time, fat will rise to the surface. You can skim it off with a spoon or ladle. Removing excess fat helps your stock last longer in storage.

Refrigeration and Freezing Guidelines
Cool your stock to room temperature within two hours. Use an ice bath to speed up this process. Place your pot in a larger bowl filled with ice water to chill it faster.
Your homemade chicken stock will last different lengths of time depending on your storage method:
| Storage Method | Duration | Best Practices |
|---|---|---|
| Refrigerator (Airtight Container) | 4-7 days | Transfer to clean containers, cover tightly |
| Freezer (Containers) | 3-6 months | Leave 1 inch headspace for expansion |
| Freezer (Ice Cube Trays) | 3 months | Transfer frozen cubes to freezer bags |
| Freezer (Flat in Bags) | 3-6 months | Lay flat for space-efficient storage |
When your homemade chicken stock cools in the refrigerator, it will become gelatinous. This jiggling texture means you made excellent stock—it’s full of collagen. The stock will return to liquid when you heat it.
For freezing, leave about one inch of headspace in containers. This allows room for expansion. You can use ice cube trays for small portions perfect for sauces or gravies.
- Thaw frozen stock overnight in your refrigerator
- Bring stock to a rolling boil before using, especially if refrigerated for several days
- Store frozen stock at 0°F or below for best quality
- Label containers with the date for easy tracking
These storage methods keep your homemade chicken stock safe, flavorful, and ready whenever you need it in your kitchen.
Creative Ways to Use Chicken Stock in Your Cooking
Homemade chicken stock is incredibly versatile. It turns simple dishes into something extraordinary. It’s more than just a soup base; it’s a flavor enhancer that makes every dish better.
It’s perfect for soups and stews. Try making chicken noodle soup, tortilla soup, or chicken and dumplings. Homemade stock adds depth and richness to these classics. It also makes creamy soups like potato leek or broccoli cheddar even more delicious.
But it’s not just for soups. Use it to cook grains and legumes. Swap water for stock when making rice, quinoa, or lentils. This simple change adds savory flavor, making these dishes stand out. Try cilantro lime rice or mushroom risotto for a taste boost.
Here are more creative uses for your chicken stock:
- Deglaze pans after searing meat to create instant pan sauces
- Use as the base for rich gravies and complex sauces
- Braise pot roasts, short ribs, and chicken thighs for tender, flavorful meat
- Enhance mashed potatoes with creaminess and flavor
- Add to stuffing or dressing for holiday meals
- Thin thick sauces or stews to reach desired consistency
- Steam or sauté vegetables for added depth
- Incorporate into casseroles and baked pasta dishes
- Sip warm from a mug, seasoned with salt and pepper for comfort
| Dish Type | Stock Application | Flavor Benefit |
|---|---|---|
| Soups | Foundation liquid | Rich, savory depth |
| Rice Dishes | Cooking liquid | Infused grain flavor |
| Sauces | Base ingredient | Body and complexity |
| Braised Meats | Cooking liquid | Tender texture and sauce |
| Vegetables | Steaming liquid | Enhanced vegetable taste |
Keep homemade chicken stock in your freezer and you’ll use it all the time. It makes every dish better. Your cooking will improve as you find new ways to use it. It’s a secret ingredient that elevates your dishes.
Conclusion
You now know how to make top-notch chicken stock at home. You’ve learned the difference between stock and broth and mastered three cooking methods. Homemade stock beats store-bought in flavor. Once you taste it, you’ll never go back to store-bought again.
Making chicken stock takes time, but the effort is minimal. You know which bones and ingredients make the best flavor. You’ve tried stovetop, slow cooker, and Instant Pot methods. This lets you choose what works best for you.
Your homemade chicken stock is more than just tasty. You control what goes into it, reducing waste and saving money. Start with bones from a rotisserie chicken for an easy start. Choose your favorite cooking method and play with flavors as you get better.
Great cooking starts with a solid foundation. You now have that foundation. Your homemade chicken stock will elevate soups, sauces, and more. This skill will make your meals better and deepen your understanding of flavors. You’re ready to make delicious meals for your family.